Knowledge Sharing

Saturday, August 29, 2015

XposedStatusText_ v1.6.apk


MYANMAR (Zawgyi)

မဂၤလာပါ ခင္​​ဗ်ာ။ ဖုန္း Screen. ရဲ့ Status Bar ေပၚမွာ ကိုယ့္နာမည္ေရးခ်င္တဲ့ သူငယ္ခ်င္းေတြ အတြက္​ XposedStatusText ဆိုတဲ့ Xposed Modules Apk ​ေလးပါ။ ေကာင္မေလးနာမည္ ေရးခ်င္လည္းေရးေပါ့ဗ်ာ၊ ဒါကေတာ့ သေဘာပါ ေမာင္။
 ဒီ App ​ေလးကို အသံုးျပုဖို့ အတြက္​ ဖုန္းမွာ Root ရွိရပါမယ္​။ Xposed Modules App တစ္​ခု ျဖစ္​တဲ့ အတြက္​ ဖုန္းမွာ Xposed Installer Appလည္း ရွိျပီးသား ျဖစ္​ရပါမယ္​။ Root ရွိျပီး Xposed Installer မရွိ​ေသးတဲ့ သူငယ္​ခ်င္းေတြ အတြက္​  Xposed Installer နွင့္​Xposed Modules မ်ား ထည့္သြင္း အသံုးျပု နည္း ကို ..ဒီ​ေနရာမွာပဲ ႏွိပ္​ၿပီး သြား​ေရာက္​​ေလ့လာ ​ေဒါင္​းယူ လိုက္​ပါ။
XposedStatusText apk ကို ​ေဒါင္းယူ၊ Install လုပ္​လိုက္​ပါ။
ျပီး​ေနာက္​...
➡Xposed Installer App ကို နွိပ္​ဖြင့္ပါ။
➡Modules ကို ဆက္​နွိပ္​ပါ။
➡Install လုပ္​ထားတဲ့ XposedStatusText app ကို ​ေတြ႕ပါလိမ့္မယ္​။ သူ႔ရဲ့ ညာဘက္​ အ​ေပၚနားက ​ေလး​ေထာင့္ကြက္​​ေလးကို နွိပ္​ျပီး အမွန္​ျခစ္​​ေလး ထည့္ေပးလိုက္​ပါ။
➡ျပီး​ေနာက္​ ဖုန္းကို reboot (or) restart လုပ္​​ေပးလိုက္​ပါ။ ျပန္​တတ္​လာတဲ့ အခါ သြားနွိပ္​ဖြင့္ျပီး ျပုျပင္​လို့ရပါျပီ​ဗ်ာ။
​ေအာက္​မွာ ပံု​ေလး​ေတြနဲ႔ ျပထား​ေပးပါတယ္။

➡XposedStatusText App ကို ဖြင့္လိုက္ပါ။
➡Enter text to display right of clock ဆိုတဲ့ စာတန္းေအာက္မွာ ေရးမယ္ ဆိုရင္ StatusBar နာရီရဲ့ ညာဘက္မွာ ေဖာ္ျပေပးမွာ ျဖစ္ပါတယ္။
➡Enter text to display left of clock ဆိုတဲ့ စာတန္းေအာက္မွာ ေရးမယ္ ဆိုရင္ StatusBar နာရီရဲ့ ဘယ္ဘက္မွာ ေဖာ္ျပေပးမွာ ျဖစ္ပါတယ္။
➡နာရီကို ေဖ်ာက္ထားခ်င္တယ္ ဆိုရင္ေတာ့ Hide Clock ဆိုတဲ့ အေရွ႕က ေလးေထာင့္ကြက္ေလးထဲမွာ အမွန္ျခစ္ေလး ထည့္ေပးလိုက္ပါဗ်ာ။
➡Clock Colour နဲ႔ Text Colour ရဲ့ အေရာင္ေတြ ေျပာင္းခ်င္တယ္ ဆိုရင္ေတာ့ Default ကို နွိပ္ျပီး Colour ေတြကို ေရႊးခ်ယ္ နိုင္ပါတယ္။
➡Select font file (.ttf) မွာ ကိုယ္ ျကိုက္နွစ္သက္တဲ့ Font Style (.ttf-file) ကို သတ္မွတ္ ေပးနိုင္ပါတယ္။
➡အားလံုး သတ္မွတ္ျပီးျပီ ဆိုရင္ေတာ့ Apply ကို နွိပ္ျပီး ျပန္ထြက္လိုက္ပါေတာ့ဗ်ာ။ ခဏၾကာတဲ့ အခါ ဖုန္းရဲ့ Status Bar ေပၚမွာ ကိုယ္ ေရးသား ျပဳ ျပင္ထားသလို ေပၚလာပါလိမ့္မယ္။

အဆင္​မ​ေျပတာ​ေလးမ်ား ရွိခဲ့ရင္​ မန္႔​ေပးခဲ့ပါ​ဗ်ာ။


MYANMAR (Unicode)

မင်္ဂလာပါ ခင်​​ဗျာ။ ဖုန်း Screen. ရဲ့ Status Bar ပေါ်မှာ ကိုယ့်နာမည်ရေးချင်တဲ့ သူငယ်ချင်းတွေ အတွက်​ XposedStatusText ဆိုတဲ့ Xposed Modules Apk ​လေးပါ။ ကောင်မလေးနာမည် ရေးချင်လည်းရေးပေါ့ဗျာ၊ ဒါကတော့ သဘောပါ မောင်။
 ဒီ App ​လေးကို အသုံးပြုဖို့ အတွက်​ ဖုန်းမှာ Root ရှိရပါမယ်​။ Xposed Modules App တစ်​ခု ဖြစ်​တဲ့ အတွက်​ ဖုန်းမှာ Xposed Installer Appလည်း ရှိပြီးသား ဖြစ်​ရပါမယ်​။ Root ရှိပြီး Xposed Installer မရှိ​သေးတဲ့ သူငယ်​ချင်းတွေ အတွက်​  Xposed Installer နှင့်​Xposed Modules များ ထည့်သွင်း အသုံးပြု နည်း ကို ..ဒီ​နေရာမှာပဲ နှိပ်​ပြီး သွား​ရောက်​​လေ့လာ ​ဒေါင်းယူ လိုက်​ပါ။
XposedStatusText apk ကို ​ဒေါင်းယူ၊ Install လုပ်​လိုက်​ပါ။
ပြီး​နောက်​...
➡Xposed Installer App ကို နှိပ်​ဖွင့်ပါ။
➡Modules ကို ဆက်​နှိပ်​ပါ။
➡Install လုပ်​ထားတဲ့ XposedStatusText app ကို ​တွေ့ပါလိမ့်မယ်​။ သူ့ရဲ့ ညာဘက်​ အ​ပေါ်နားက ​လေး​ထောင့်ကွက်​​လေးကို နှိပ်​ပြီး အမှန်​ခြစ်​​လေး ထည့်ပေးလိုက်​ပါ။
➡ပြီး​နောက်​ ဖုန်းကို reboot (or) restart လုပ်​​ပေးလိုက်​ပါ။ ပြန်​တတ်​လာတဲ့ အခါ သွားနှိပ်​ဖွင့်ပြီး ပြုပြင်​လို့ရပါပြီ​ဗျာ။
​အောက်​မှာ ပုံ​လေး​တွေနဲ့ ပြထား​ပေးပါတယ်။

➡XposedStatusText App ကို ဖွင့်လိုက်ပါ။
➡Enter text to display right of clock ဆိုတဲ့ စာတန်းအောက်မှာ ရေးမယ် ဆိုရင် StatusBar နာရီရဲ့ ညာဘက်မှာ ဖော်ပြပေးမှာ ဖြစ်ပါတယ်။
➡Enter text to display left of clock ဆိုတဲ့ စာတန်းအောက်မှာ ရေးမယ် ဆိုရင် StatusBar နာရီရဲ့ ဘယ်ဘက်မှာ ဖော်ပြပေးမှာ ဖြစ်ပါတယ်။
➡နာရီကို ဖျောက်ထားချင်တယ် ဆိုရင်တော့ Hide Clock ဆိုတဲ့ အရှေ့က လေးထောင့်ကွက်လေးထဲမှာ အမှန်ြခစ်လေး ထည့်ပေးလိုက်ပါဗျာ။
➡Clock Colour နဲ့ Text Colour ရဲ့ အရောင်တွေ ပြောင်းချင်တယ် ဆိုရင်တော့ Default ကို နှိပ်ပြီး Colour တွေကို ရွှေးချယ် နိုင်ပါတယ်။
➡Select font file (.ttf) မှာ ကိုယ် ကြိုက်နှစ်သက်တဲ့ Font Style (.ttf-file) ကို သတ်မှတ် ပေးနိုင်ပါတယ်။
➡အားလံုး သတ်မှတ်ြပီးပြီ ဆိုရင်တော့ Apply ကို နှိပ်ြပီး ပြန်ထွက်လိုက်ပါတော့ဗျာ။ ခဏကြာတဲ့ အခါ ဖုန်းရဲ့ Status Bar ပေါ်မှာ ကိုယ် ရေးသား ပြု ပြင်ထားသလို ပေါ်လာပါလိမ့်မယ်။

အဆင်​မ​ပြေတာ​လေးများ ရှိခဲ့ရင်​ မန့်ပေးခဲ့ပါ​ဗျာ။


Link Download


ScreenOffAnimations_ v1.3.apk (Xposed Modules)


MYANMAR (Zawgyi)

မဂၤလာပါ ခင္​​ဗ်ာ။ ဖုန္​း Screen. ကို Animation ဒီဇိုင္​း လွလွ​ေလး​ေတြနဲ႔ အဖြင္​့၊ အပိတ္​ လုပ္​ဖို႔ အတြက္​ Screen Off Animations ဆိုတဲ့ Xposed Modules Apk ​ေလးပါ။ ဒီ App ​ေလးကို အသံုးျပဳဖို႔ အတြက္​ ဖုန္​းမွာ Root ရိွရပါမယ္​။ Xposed Modules App တစ္​ခု ျဖစ္​တဲ့ အတြက္​ ဖုန္​းမွာ Xposed Installer Appလည္​း ရိွၿပီးသား ျဖစ္​ရပါမယ္​။ Root ရိွၿပီး Xposed Installer မရိွ​ေသးတဲ့ သူငယ္​ခ်င္​​းေတြ အတြက္​  Xposed Installer ႏွင္​့ Xposed Modules မ်ား ထည္​့သြင္​း အသံုးျပဳ နည္​း ကို ..ဒီ​ေနရာမွာပဲ ႏွိပ္​ၿပီး သြား​ေရာက္​​ေလ့လာ ​ေဒါင္​းယူ လိုက္​ပါ။

Screen Off Animation apk ကို ​ေဒါင္​းယူ၊ Install လုပ္​လိုက္​ပါ။ 
ၿပီး​ေနာက္​...
➡Xposed Installer App ကို ႏွိပ္​ဖြင္​့ပါ။
➡Modules ကို ဆက္​ႏွိပ္​ပါ။
➡Install လုပ္​ထားတဲ့ Screen Off Animation app ကို ​ေတြ႕ပါလိမ္​့မယ္​။ သူ႔ရဲ႕ ညာဘက္​ အ​ေပၚနားက ​ေလး​ေထာင္​့ကြက္​​ေလးကို ႏွိပ္​ၿပီး အမွန္​ျခစ္​​ေလး ထည္​့​ေပးလိုက္​ပါ။
➡ၿပီး​ေနာက္​ ဖုန္​းကို reboot (or) restart လုပ္​​ေပးလိုက္​ပါ။ ျပန္​တတ္​လာတဲ့ အခါ သြားႏွိပ္​ဖြင္​့ၿပီး ျပဳျပင္​လို႔ရပါၿပီ​ဗ်ာ။
​ေအာက္​မွာ ပံု​ေလး​ေတြနဲ႔ ျပထား​ေပးပါတယ္​။ ➡ပထမဆံုး Screen Off ဆိုတဲ့ ​ေခါင္​းစဥ္​​ေအာက္​က Screen Off ဆိုတဲ့ စာ​ေၾကာင္​းကို ႏွိပ္​ၿပီး ON ​ေပးလိုက္​ရပါမယ္​။ 
➡Select Animations ဆိုတဲ့ စာ​ေၾကာင္​းကိုႏွိပ္​ၿပီး ကိုယ္​ ႀကိဳက္​ႏွစ္​သက္​ Animation ပံုစံကို ​ေရႊးခ်ယ္​ အသံုးျပဳႏိုင္​ပါတယ္​။ 
➡Animation လႉပ္​႐ွားမႉ အ​ေႏွး၊ အျမန္​ကို​ေတာ့ Speed မွာ ​ေရႊ႔ၿပီး သတ္​မွတ္​ ​ေပးႏိုင္​ပါတယ္​။
➡Preview က​ေတာ့ ကိုယ္​ သတ္​မွတ္​ထားတဲ့ Animation ကို ျပန္​ၾကည္​့ႏိုင္​တဲ့ ​ေနရာပါပဲ။
​ေနာက္​ထပ္​ တစ္​မ်က္​ႏွာကို ဆြဲလိုက္​ရင္​ Screen On ဆိုတဲ့ ​ေခါင္​းစဥ္​ကို ​ေတြရပါလိမ္​့မယ္​။ အဲ့ဒီ အပိုင္​းမွာလည္​း ​ေျပာခဲ့ၿပီးတဲ့ ပံုစံအတိုင္​းပဲ ကိုယ္​ႀကိဳက္​ႏွစ္​သက္​ရာ ​ေရႊးခ်ယ္​​ေပးႏိုင္​ပါတယ္​။ 

😃 အဆင္​မ​ေျပတာ​ေလးမ်ား ရိွခဲ့ရင္​ မန္​႔​ေပးခဲ့ပါ​ဗ်ာ။

MYANMAR (Unicode)

မင်္ဂလာပါ ခင်​​ဗျာ။ ဖုန်း Screen. ကို Animation ဒီဇိုင်း လှလှ​လေး​တွေနဲ့ အဖွင့်၊ အပိတ် လုပ်ဖို့ အတွက်​ Screen Off Animations ဆိုတဲ့ Xposed Modules Apk ​လေးပါ။ ဒီ App ​လေးကို အသုံးပြုဖို့ အတွက်​ ဖုန်းမှာ Root ရှိရပါမယ်​။ Xposed Modules App တစ်​ခု ဖြစ်​တဲ့ အတွက်​ ဖုန်းမှာ Xposed Installer Appလည်း ရှိပြီးသား ဖြစ်​ရပါမယ်​။ Root ရှိပြီး Xposed Installer မရှိ​သေးတဲ့ သူငယ်​ချင်းတွေ အတွက်​  Xposed Installer နှင့်​Xposed Modules များ ထည့်သွင်း အသုံးပြု နည်း ကို ..ဒီ​နေရာမှာပဲ နှိပ်​ပြီး သွား​ရောက်​​လေ့လာ ​ဒေါင်းယူ လိုက်​ပါ။

Screen Off Animation apk ကို ​ဒေါင်းယူ၊ Install လုပ်​လိုက်​ပါ။ 
ပြီး​နောက်​...
➡Xposed Installer App ကို နှိပ်​ဖွင့်ပါ။
➡Modules ကို ဆက်​နှိပ်​ပါ။
➡Install လုပ်​ထားတဲ့ Screen Off Animation app ကို ​တွေ့ပါလိမ့်မယ်​။ သူ့ရဲ့ ညာဘက်​ အ​ပေါ်နားက ​လေး​ထောင့်ကွက်​​လေးကို နှိပ်​ပြီး အမှန်​ခြစ်​​လေး ထည့်ပေးလိုက်​ပါ။
➡ပြီး​နောက်​ ဖုန်းကို reboot (or) restart လုပ်​​ပေးလိုက်​ပါ။ ပြန်​တတ်​လာတဲ့ အခါ သွားနှိပ်​ဖွင့်ပြီး ပြုပြင်​လို့ရပါပြီ​ဗျာ။
​အောက်​မှာ ပုံ​လေး​တွေနဲ့ ပြထား​ပေးပါတယ်​။ ➡ပထမဆုံး Screen Off ဆိုတဲ့ ​ခေါင်းစဉ်​​အောက်​က Screen Off ဆိုတဲ့ စာ​ကြောင်းကို နှိပ်​ပြီး ON ​ပေးလိုက်​ရပါမယ်​။ 
➡Select Animations ဆိုတဲ့ စာ​ကြောင်းကိုနှိပ်​ပြီး ကိုယ်​ ကြိုက်​နှစ်​သက်​ Animation ပုံစံကို ​ရွှေးချယ်​ အသုံးပြုနိုင်​ပါတယ်​။ 
➡Animation လှူပ်​ရှားမှူ အ​နှေး၊ အမြန်​ကို​တော့ Speed မှာ ​ရွှေ့ပြီး သတ်​မှတ်​ ​ပေးနိုင်​ပါတယ်​။
➡Preview က​တော့ ကိုယ်​ သတ်​မှတ်​ထားတဲ့ Animation ကို ပြန်​ကြည်​့နိုင်​တဲ့ ​နေရာပါပဲ။
​နောက်​ထပ်​ တစ်​မျက်​နှာကို ဆွဲလိုက်​ရင်​ Screen On ဆိုတဲ့ ​ခေါင်းစဉ်​ကို ​တွေရပါလိမ်​့မယ်​။ အဲ့ဒီ အပိုင်းမှာလည်း ​ပြောခဲ့ပြီးတဲ့ ပုံစံအတိုင်းပဲ ကိုယ်​ကြိုက်​နှစ်​သက်​ရာ ​ရွှေးချယ်​​ပေးနိုင်​ပါတယ်​။ 

😃 အဆင်​မ​ပြေတာ​လေးများ ရှိခဲ့ရင်​ မန့်ပေးခဲ့ပါ​ဗျာ။


Link Download


Friday, August 28, 2015

Xposed Installerႏွင္​့ Xposed Modules မ်ား ထည္​့သြင္​း အသံုးျပဳနည္​း

✔ Xposed Installer_ v2.6.1.apk


✔ မဂၤလာပါ ခင္​​ဗ်ာ။ 
      ဒီတစ္​ခါ Android ဖုန္​း​ေတြကို Root ​ေဖာက္​ထားၿပီး အ​ေကာင္​းဆံုး လုပ္​​ေဆာင္​ခ်က္​ (function) ​ေတြနဲ႔ အသံုးျပဳခ်င္​တဲ့ သူငယ္​ခ်င္​း​ေတြ အတြက္​ Xposed Installer ဆိုတဲ့ လူသံုးမ်ားလာၿပီ ျဖစ္​တဲ့ App ​ေလးနဲ႔ မိတ္​ဆက္​​ေပးခ်င္​ပါတယ္​။ ဒီ App ​ေလးကို ဖုန္​းထဲမွာ Install လုပ္​ထားရင္​ သူရဲ႕ modules ​ေနရာမွာ Plugin လုပ္​ၿပီး သံုးရမယ္​ Apps ​ေတြရဲ႕ လုပ္​​ေဆာင္​ခ်က္​​ေတြက သူငယ္​ခ်င္​းတို႔ စိတ္​ႀကိဳက္​ ျဖစ္​​ေစလိမ္​့မယ္​ ထင္​ပါတယ္​။ Xposed Installer နဲ႔ Plugin လုပ္​ၿပီး သံုးရမယ္​ Xposed Module Apps ​ေတြ ​အမ်ားႀကီး ရိွပါတယ္​။ အဲဒီ အထဲက ႏွစ္​ခု​ေလာက္​ကို တင္​ျပ​ေပးသြားပါမယ္​။ က်​ေနာ္​့ Blog ​ေလးရဲ႕ ​ေ႐ွ႕ပိုင္​း Post ​ေတြထဲမွာလည္​း Wannam Xposed နဲ႔ Wannam Kit ဆိုတဲ့ Xposed Moudules ႏွစ္​ခု​ တင္​ထား​​ေပးၿပီး ျဖစ္​ပါတယ္​။

 ✔     Xposed installer ကို အသံုးျပဳဖို႔အတြက္ ပထမဆံုး ကိုယ္​့ရဲ႕ ဖုန္​းမွာ Root ရိွရပါမယ္​။ Xposed Installer ကို ​ေအာက္​မွာ ​ေဒါင္​းၿပီးယူပါ။
​ေဒါင္​းလို႔ ရလာတဲ့ Xposed Installer Apk ကို install လုပ္​ပါ။ 
      Xposed Installer ဆိုတဲ့ App ပံု​ေလး ကိုယ္​့ရဲ႕ ဖုန္​းထဲမွာ ​ေရာက္​​ေနတာ​ေတြ႕ရပါလိမ္​့မယ္​။ ဟုတ္​တယ္​​ေနာ္​..ခ္​..ခ္​။
      ကဲ..​ဗ်ာ...ဖုန္​းထဲမွာ ​ေရာက္​ရိွ​ေနတဲ့ Xposed Installer ဆိုတဲ့ App ​ေလးကိုႏွိပ္​ၿပီး ဖြင္​့လိုက္​ပါ​ေနာ္​..၊ 
     အဲ့ဒီမွာ ပထမဆံုး Framework ဆိုတဲ့ အပိုင္​းမွာ အနီ​ေရာင္​ စာတန္​း​ေတြ ျပ​ေနပါလိမ္​့မယ္​။ Not active ပါ။ Xposed modules ​ေတြကို Plugin လုပ္​ၿပီး အသံုးျပဳႏိုင္​ဖို႔ အတြက္​ Framework က Active ျဖစ္​ရပါမယ္​။
➡Active ျဖစ္​ဖို႔ အတြက္​ အနီ​ေရာင္​စာတန္းနဲ႔ Framework ဆိုတဲ့ အပိုင္​းကို ႏွိပ္​လိုက္​ပါ၊ 
➡​Be Careful! ဆိုတဲ့ ​ေဘာက္​က​ေလးတစ္​ခု​ ေပၚလာပါလိမ္​့မယ္​၊ Ok. ႏွိပ္​​ေပးလိုက္​ပါ။ 
➡ၿပီးရင္​ Install/Update ဆိုတာကို ႏွိပ္​ပါ။
➡Superuser request ​ေတာင္​းလာတဲ့ အခါ Grant (or) Allow. ကို ႏွိပ္​​ေပးလိုက္​ပါ။
➡ ၿပီးရင္​ ​ေဘာက္​က​ေလး တစ္​ခု ​ေပၚလာပါဦးမယ္​ Phone ကို Reboot (or) Restart လုပ္​ခိုင္​းတာပါ၊ Ok ကို ႏွိပ္​​ေပးလိုက္​ပါ။ 
       ဖုန္​းက Reboot ျပန္​တတ္​လာတဲ့ အခါ Xposed installer ကို ျပန္​ဖြင္​့ၾကည္​့ပါ အနီ​ေရာင္​စာတန္​း မရိွ​ေတာ့ပဲ Active ျဖစ္​​ေနရပါမယ္​။

✔Xposed Installer ရဲ႕ ဒုတိယ အပိုင္​းက​ေတာ့ Modules ပါပဲ၊ အဲ့ဒီ​ေနရာမွာ Plugin လုပ္​ၿပီး သံုးရတဲ့ Xposed Modules App ​ေတြရဲ႕ ​ေနရာ​ေပါ့​ဗ်ာ၊ Xposed Modules App ​ေတြကို ​ေဒါင္​းယူ၊ install လုပ္​ၿပီးတဲ့ အခါ အဲ့ဒီ ​ေနရာမွာ သြားၿပီး၊ အသံုးျပဳမယ္​့ Modules App ကို အမွတ္​​ေလးကို သြားၿပီး ျခစ္​​ေပးရပါမယ္​။ ၿပီးရင္​ Modules App ကိုႏွိပ္​ၿပီး သူ႔ရဲ႕ လုပ္​​ေဆာင္​ႏိုင္​စြမ္​း ရိွတဲ့ အတိုင္​းအတာ အတြင္​းမွာ ကိုယ္​့ စိတ္​တိုင္​းက် ျပဳျပင္​ႏိုင္​ပါတယ္​။ ျပဳျပင္​ၿပီးတဲ့ အခါ ဖုန္​းကို Reboot (or) restart. ထပ္​ၿပီး လုပ္​​ေပးရပါမယ္​။ (မွတ္​ခ်က္​- အခ်ိဳ႕ Modules Apps မ်ားက ✅အမွတ္​ျခစ္​၊ Reboot လုပ္​ၿပီးမွ ျပဳ ျပင္​ႏုိင္​သည္​။)

✔ Xposed Installer ရဲ႕ တတိယ ​အပိုင္​းက​ေတာ့ Downloads ပါ။ က်​ေနာ္​တို႔ ႀကိဳက္​ႏွစ္​သက္​ရာ Modules Apps မ်ားစြာကို ႐ွာ​ေဖြ ​ေဒါင္​းယူ၊ Install လုပ္​ႏိုင္​ပါတယ္​။ ဒါ့အျပင္​ Google search မွာ Xposed Modules လို႔ ႐ိုက္​ၿပီး Best Xposed Modules ​ေတြကို ႐ွာ​ေဖြ ​ေဒါင္​းယူႏိုင္​ပါတယ္​။
....​ေအာက္​မွာ ပံု​ေလး​ေတြနဲ႔ အတတ္​ႏိုင္​ဆံုး ႐ွင္​း​ေအာင္​ တင္​ျပ​ေပးထားပါတယ္​။ 
⭐⭐ Xposed installer App ကို Android Version အနိမ္​့​ေတြက​ေန Version_4.4.4 အထိ အသံုးျပဳ ႏိုင္​တဲ့ Xposed Installer_v2.6.1.apk ကို ​ေပးထားပါတယ္​။ 
⭐⭐Lolipop ​Version ​ေတြ အတြက္​က​ေတာ့ Xposed Installer_ v3.0-Alpha-2-3-4 စသည္​ျဖင္​့ Lolipop Version အလိုက္​ ​​ေရြးၿပီး သံုးရမွာရယ္​ Xposed Installer - Framework ....Active ျဖစ္​ဖို႔ အတြက္​ ​ေနာက္​ထပ္​ Tools ႏွစ္​ခု.သံုးခု ​ေပါင္​းထည္​့​ေပးမွ Active ျဖစ္​ၿပီး သံုးလို႔ အဆင္​​ေျပမွာ ျဖစ္​တဲ့ အတြက္​ အနည္​းငယ္​ ႐ႈပ္​​ေထြးၿပီး ရြာလည္​ စရာျဖစ္​​ေနတဲ့ အတြက္​ ​ေနာက္​ အဆင္​​ေျပ အခ်ိန္​ရတဲ့ အခါ ႀကိဳးစားၿပီး ​ေရး​ေပးပါ့မယ္​့...​
           ⭐⭐ ​....ေက်းဇူးတင္​ပါတယ္​....⭐⭐


✔ APM+_v17.11.apk ( Xposed Modules )


✔ လ်ွာ႐ွည္​ပါဦးမယ္​ ခင္​​ဗ်ာ....
 Xposed Installer အခန္​း ၿပီးၿပီ ဆို​ေတာ့ ​ေျပာခဲ့တဲ့ အတိုင္​း ..Plugin လုပ္​ၿပီး သံုးဖို႔ Xposed Modules ႏွစ္​ခု ဆက္​ၿပီး တင္​​ေပးလိုက္​ပါတယ္​။
1. APM+ ဆိုတဲ့ Xposed Modules ​apk ​ေလးပါ။
APM+ ကို ​ေဒါင္​းယူ၊ Install လုပ္​ပါ။ 
➡ၿပီးရင္​ ဖုန္​းထဲမွာ  Xposed Installer App ကို ႏွိပ္​ၿပီး ဖြင္​့လိုက္​ပါ။
➡Modules ကို ႏွိပ္​ပါ။ APM+ App ကို ​ေတြ႕ရပါမယ္​။ ညာဘက္​ အစြန္​းက အကြက္​​ေလးထဲမွာ အမွန္​ျခစ္​​ေလး ​ေပးလိုက္​ပါ။ ၿပီးရင္​ reboot (or) restart လုပ္​​ေပးလိုက္​ပါ။( အခ်ိဳ႕ modules ​app ​ေတြက အမွန္​ျခစ္​၊ တစ္​ခါထဲ ျပဳ​ ျပင္​ၿပီးမွ Reboot လုပ္​လည္​း ရပါတယ္​။)
➡APM+ App ကို ႏွိပ္​ၿပီး ဖြင္​့လိုက္​ပါ။ Xposed Installer ရဲ႕ Modules ထဲမွာပဲ သြားၿပီး ဖြင္​့တာ အ​ေသခ်ာဆံုးပါပဲ​​ဗ်ာ။
 [APM+ App ​ေလးက ဘာ​ေတြ အသံုးျပဳ လို႔ရသလဲ ဆို​ေတာ့ က်​ေနာ္​တို႔ ဖုန္​းရဲ႕ POWER ခလုတ္​ ( device options) ကို ဖိႏွိပ္​လိုက္​တဲ့ အခါ ပံုမွန္​အားျဖင္​့ power off, mobile data, Airplane mode နဲ႔ reboot (or) restart ​စသည္​ျဖင္​့ ပါပါတယ္​။]
 ႏွိပ္​ဖြင္​့ထားတဲ့ APM+ App ရဲ႕ ​ေအာက္​ဘက္​မွာ အစိမ္​း​ေရာင္​ အ​ေပါင္​းလကၡဏာ အကြက္​​ေလးကို ႏွိပ္​ၿပီး 
➡ Screenshot
➡ Screen record
➡ Flashlight
➡Quick dial ( ဖုန္​းနံပါတ္​ တစ္​ခု)
 ​ေတြကို ​ေပါင္​းထည္​့ႏိုင္​ပါတယ္​။ Theme ​ေတြကိုလည္​း ႀကိဳက္​သလို ​ေရြးခ်ယ္​ သံုးႏိုင္​ပါတယ္​။ ဒါ့အျပင္​ အသံုးမလိုတဲ့ ဟာကို edit, move, remove လုပ္​ထားႏိုင္​ပါတယ္​။ ျပဳ ျပင္​ၿပီးၿပီ ဆိုရင္​​ေတာ့ ဖုန္​းကို restart (or) reboot လုပ္​​ေပးလိုက္​ပါ။ ျပန္​တတ္​လာရင္​​ေတာ့ ကိုယ္​ ျပဳ ျပင္​ထားသလို ​ေတြ႕ရပါလိမ္​့မယ္​။

✔ Xposed Installer ရဲ႕ Modules ​ေတြ ကို အသံုးျပဳပံုက​ေတာ့ အတူတူပါပဲ ခင္​​ဗ်ာ။ 
Modules App ​ေတြ ရဲ႕ လုပ္​​ေဆာင္​ႏိုင္​စြမ္​းနဲ႔ လုပ္​​ေဆာင္​ခ်က္​​ေတြကို သူငယ္​ခ်င္​းတို႔ စိတ္​ႀကိဳက္​ ျပဳ ျပင္​ၿပီး သံုးရမွာပါပဲ​ဗ်ာ။ ✔


✔Gesture Navigation_ v1.0.6.apk ( Xposed Modules )


✔ ​​ေနာက္​ထပ္​ Xposed Modules တစ္​ခုက​ေတာ့...
⭐Gesture Navigation ဆိုတဲ့ apk ​ေလးပါ။ ဒီ Apk ​ေလးက google playstore မွာ 💲2 ​..ေက်ာ္​​ေလာက္​ ​ေပးရတဲ့ ဟာ​ေလးပါ။ က်​ေနာ္​က ခိုးလာတာ၊ ခ္​..ခ္​..။
မွားလို႔ပါ ...က်​ေနာ္​တို႔အားလံုး ဝယ္​ၿပီး သံုးႏိုင္​တဲ့ သူ​ေတြပါပဲ​ဗ်ာ။ ဒီအ​ေၾကာင္​း​ေတြ ​ေျပာရရင္​ ႏိုင္​ငံ​ေရး​ေတြ ပါကုန္​​ေတာ့မယ္​ ထင္​တယ္​၊ ထားပါ​ေတာ့​ဗ်ာ။
 အဲဒီ Gesture Navigation apk ​ေလးက ဘယ္​လို အလုပ္​လုပ္​လဲ ဆို​ေတာ့ သူ႔အထဲမွာ
➡ Edge Gesture
➡ Two Finger Gestures
➡ Three Finger Gestures
➡ Four Finger Gestures
➡ Five Finger Guestures
➡ Touch  Gestures
➡ Hold Gestures
➡ Status Bar Gestures
➡ Notification Panel Gestures
➡ Navigation Bar Gestures
➡ Lockscreen Glowpad Gestures ​ေတြ ပါဝင္​ပါတယ္​။
✔ က်​ေနာ္​ ​ေစတနာထားတဲ့ အတိုင္​း တစ္​ခု​ေတာ့ ႐ွင္​းျပ​ေပးပါ့မယ္​။
⭐ Edge Gestures ......ပါ။
Edge = အစြန္​းအဖ်ား
Gesture = ကိုယ္​ခႏၶာ/ ​ေျခလက္​မ်ား၏ ထင္​႐ွား​ေသာ လႉပ္​႐ွားမႉ
အဲ့ေတာ့​ဗ်ာ ..အစြန္​းအဖ်ား​ေလး​ေတြကို က်​ေနာ္​တို႔ လက္​က​ေလး​ေတြနဲ႔ လႉပ္​႐ွားရမယ္​ ဆိုပါ​ေတာ့..
ခိ..ခိ...က်​ေနာ္​ ဘာသာျပန္​တာ မိုက္​တယ္​​ေနာ္​..႐ွင္​း​ေန​ေရာ..

Gesture Navigation apk ကို ​ေဒါင္​းယူ၊ install လုပ္​ပါ။
➡Install လုပ္​ၿပီးရင္​ Xposed Installer App ကို ဖြင္​့ပါ။
➡Modules ကိုႏွိပ္​ဖြင္​့ပါ။ Gesture Navigation app ကို​ေတြ႕ပါလိမ္​့မယ္​။ အမွန္​ျခစ္​ေပးၿပီးရင္​ ႏွိပ္​ဖြင့္​့လိုက္​ပါ။
အဲဒီမွာ စ.​ေတြ႕ပါလိမ္​့မယ္​
ပထမဆံုး ျဖစ္​တဲ့ Edge Gestures ကို အသံုးျပဳဖို႔ နားလည္​သ​ေလာက္​​ေလး ​ေျပာျပ​ေပးပါမယ္​။
Edge Gesture ထဲမွာပဲ ပါဝင္​တာ​ (၄) မ်ိဳး ရိွပါတယ္​..
1. Right Edge Gestures ( ညာဘက္​ အစြန္​း လႉပ္​႐ွားမႉ )

2. Left Edge Gestures ( ဘယ္​ဘက္​ အစြန္​း လႉပ္​႐ွားမႉ )

3. Top Edge Gestures ( အ​ေပၚဘက္​ အစြန္​း လႉပ္​႐ွားမႉ )

4. Bottom Edge Gestures ​( ​ေအာက္​​ေျခဘက္​ အစြန္​း လႉပ္​႐ွားမႉ ) ​ေတြပဲ ျဖစ္​ပါတယ္​။

အဲဒီ ​ေလးမ်ိဳး ထဲက​ေန Right Edge Gestures ကို ႐ွင္​းျပ​ေပးပါမယ္​။ Function ​ေတြ မ်ားလြန္​းလို႔ နည္​းနည္​းပဲ ႐ွင္​းျပပါရ​ေစ။ စာ​ေတြလည္​း မ်ား​ေနလို႔ပါ​ေနာ္​။
Right Edge Gestures ကို ႏွိပ္​ၿပီး ဖြင္​့လိုက္​ရင္​
➡Right Edge Gestures
➡Left Swipe
➡Up Swipe
➡Down swipe
➡Single Tap
➡Double Tap ဆိုၿပီး ဆက္​​ေတြ႕ရပါလိမ္​့မယ္​။
အဲဒီမွာ အ​ေပၚဆံုးက Right Edge Gestures ဆိုတာ တစ္​ခ်က္​ႏွိပ္​လိုက္​ပါ။ အစိမ္​း​ေရာင္​ အတံုး​ေလး ျပ​ေနမွ ​ေအာက္​မွာ ကိုယ္​ သတ္​မွတ္​ထားတာ​ေတြ အလုပ္​လုပ္​မွာ ျဖစ္​ပါတယ္​။ ဖြင္​့ထား​ေပးရပါမယ္​။
Right Edge Gestures က ဖုန္​းကိုင္​တဲ့ အခါ ညာဘက္​အျခမ္​းပါ။ ဟုတ္​တယ္​​ေနာ္​..😊 ညာဘက္​အျခမ္​း မီးလင္​း​ေနတဲ့ ဖုန္​း screen အစပ္​နား၊ ဖုန္​းကာ​ဗာ ​ေဘာင္​ရဲ႕ အတြင္​းဘက္​ အစပ္​နားပဲ ဆိုပါ​ေတာ့​ဗ်ာ။
အဲ့ဒီ နယ္​စပ္​နားကို လက္​ညိဳး၊ လက္​မ ​ေလး​ေတြနဲ႔ ထိၿပီး အသံုးျပဳ လႉပ္​႐ွား​ေပးရပါမယ္​။ Left Sipe ဘယ္​ဘက္​ကို ဆြဲ​ေရႊ႔ပါ၊ Up Swipe အ​ေပၚဘက္​ကို ဆြဲ​ေရႊ႔ပါ။ Down Swipe ​ေအာက္​ဘက္​ကို ဆြဲ​ေရႊ႔ပါ။ Single Tap တစ္​ခ်က္​ ထိ​ေခါက္​​ေပးပါ။ Double Tap ႏွစ္​ခ်က္​ဆင္​့ၿပီး ထိ​ေခါက္​​ေပးပါ။
ဥပမာ..Left swipe ဆိုပါ​ေတာ့၊ ခုက ညာဘက္​အစြန္​းနား လုပ္​​ေဆာင္​ခ်က္​​ေတြကို ျပဳလုပ္​​ေပးမွာ ျဖစ္​တဲ့ အတြက္​ သူက Left Swipe ကို ပဲ ​ေပးထားပါတယ္​၊ ညာဘက္​အစြန္​းက​ေန ညာဘက္​ကို ဆက္​ဆြဲရင္​ ဖုန္​း Screen အျပင္​ဘက္​ပဲ ​ေရာက္​သြားမွာ​ေပါ့​ေနာ္​။ ဘယ္​ဘက္​ကို ကိုဆြဲရပါမယ္​။
Left Swipe - ကို ႏွိပ္​လိုက္​ပါ ဖုန္​းထဲက Apps ​ေတြ ​ေပၚလာပါလိမ္​့မယ္​၊ တစ္​ခုကို သက္​မွတ္​​ေပးရပါမယ္​
Up Swipe ကို ႏွိပ္လိုက္​ပါ ဖုန္​းထဲက Apps ​ေတြ ​ေပၚလာပါလိမ္​့မယ္​၊ တစ္​ခုကို သတ္​မွတ္​​ေပးလိုက္​ပါ။
Down Swipe , Single Tap ႏွင္​့ Double Tap ​ေတြကိုလည္​း ဒီနည္​း အတိုင္​းပဲ သက္​မွတ္​ ​ေပးရတာပါပဲ။သတ္​မွတ္​ၿပီးရင္​ စမ္​းၾကည္​့ႏိုင္​ပါတယ္​၊ ဒီ Reboot (or) Restart မလုပ္​လည္​း ရပါတယ္​ ခင္​​ဗ်ာ။
က်​ေနာ္​က​ေတာ့ Single Tap ႏွင္​့ Double Tap ​ေတြကို မထားပဲ ( No Action ) လုပ္​ထားပါတယ္​။ ကီးဘုတ္​႐ိုက္​တဲ့ အခါ အစြန္​း​ေလး​ေတြကို သြား.ကလိမိ​ေတာ့ သတ္​မွတ္​ထားတဲ့ Apps ​ေတြက ဘြားခနဲ႔ ​ေပၚလာတတ္​လို႔ပါ။ ကိုယ္​့ လက္​ ကိုယ္​ ထိန္​းႏိုင္​တယ္​ ဆိုရင္​​ေတာ့ ထား​ေပါ့​ဗ်ာ။

✅ Apk ​ေတြကို ​ေအာက္​မွာ ​ေဒါင္​းၿပီး ယူပါ ခင္​​ဗ်ာ။ လိုအပ္​ခ်က္​​ေလးမ်ား အဆင္​မ​ေျပတာ​ေလးမ်ား ရိွခဲ့ရင္​လည္​း မန္​႔​ေပးခဲ့လိုက္​ပါ ခင္​​ဗ်ာ။ ✅


Wednesday, August 26, 2015

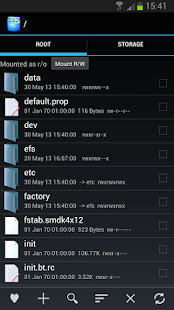
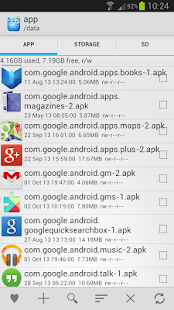
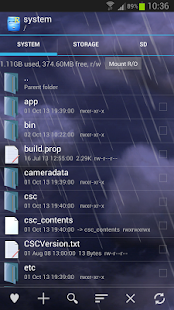
Root Explorer_v3.3.5.apk

✅ Description ✅

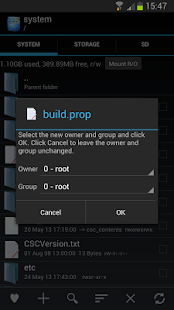
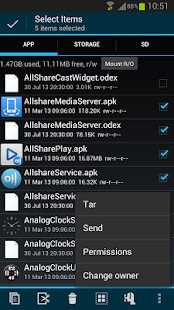
Root Explorer is the ultimate file manager for root users. Access the whole of android's file system (including the elusive data folder!).
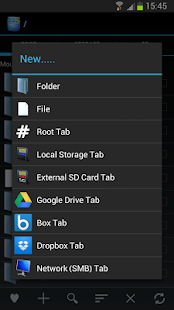
Features include multiple tabs, Google Drive, Box, Dropbox and network (SMB) support, SQLite database viewer, Text Editor, create and extract zip or tar/gzip files, extract rar archives, multi-select, execute scripts, search, remount, permissions, bookmarks, send files (via email, bluetooth etc), image thumbnails, APK binary XML viewer, change file owner/group, create symbolic link, "Open With" facility, MD5, create shortcuts.
For fast, friendly support simply email us: support@speedsoftware.co.uk
We will always try to help with any problem you may have with the app. If we can't help then you can have a refund, no questions asked.
Although 22,000+ five star ratings will tell you that most people are very satisfied customers. Make sure you read as many comments as possible to get a good idea of what most people think of the app.
We still respect the old 24 hour refund policy. So if you're not happy with the app just email us within 24 hours and you can have a refund. We'll need to know the order number, which you can find on the emails sent to you by Google when you downloaded.
Why compromise? Get the original and the best!
New permissions:
Full network access - Required for network and cloud access. No information is passed to us over the internet.
Add or remove accounts - Used by the Google Drive SDK to add a new account if desired. No changes are made to existing accounts and no details accessed apart from the account name.
Find accounts on the device - Used to list available accounts for logging into Google Drive.
Prevent from sleeping - Used to stop the device sleeping during long operations so they are not interrupted.

⭐What's New
3.3.5
• Improved archive extraction to SD card in Lollipop
• Fix for problem opening text files in /data/misc
• Other miscellaneous fixes
3.3 -> 3.3.4
• Allow write to external SD without root in Android 5.0 Lollipop
• Display SE Linux context in file/folder properties (Android 4.3+)
• Change SE context menu option (Android 4.3+)

⭐Requires Android
Varies with device


⬇⬇⬇⬇⬇⬇⬇⬇⬇⬇⬇⬇⬇⬇⬇⬇⬇⬇ Link Download ⬇⬇⬇⬇⬇⬇⬇⬇⬇⬇⬇⬇⬇⬇⬇⬇⬇⬇


Cinema FV-5_ v1.47.apk

✅ Description ✅

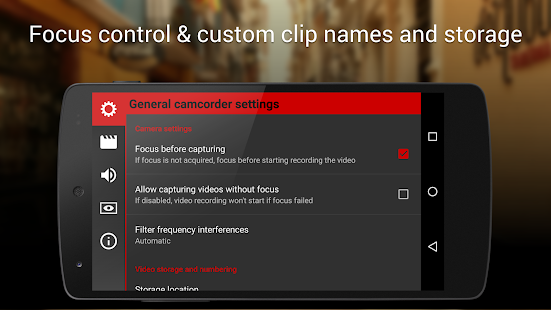
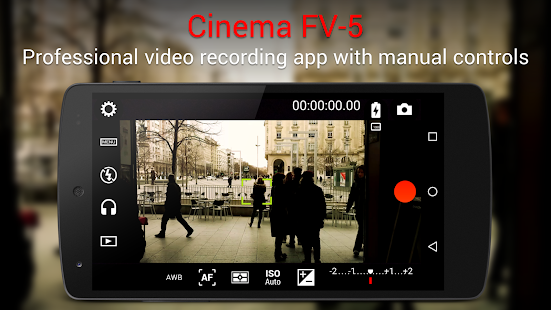
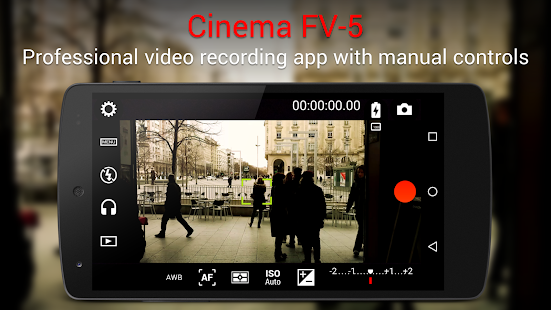
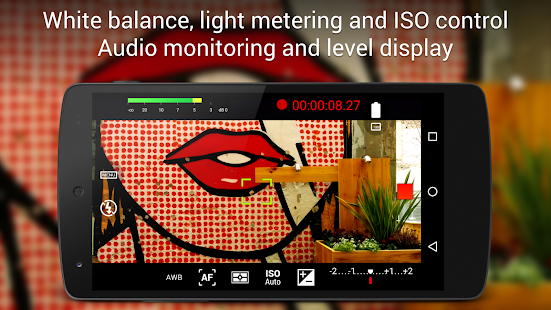
Cinema FV-5 is a professional video camera application for mobile devices, that puts professional manual controls in your fingertips. Tailored to enthusiast and professional videographers and filmmakers, with this video camera application you can capture the best footage with top-of-the-line controls for perfect postproduction purposes. The only limit is your imagination and creativity!

Major features:
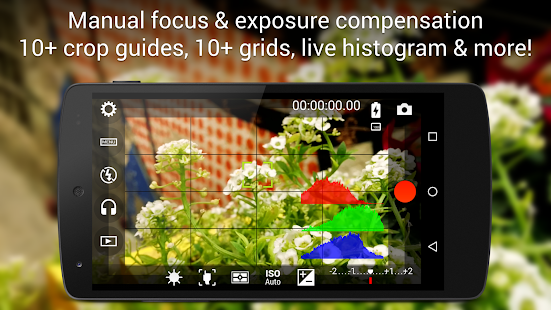
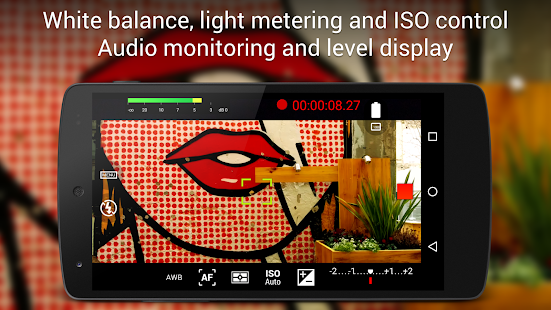
● Adjust all the image sensor parameters that you only thought pro-videocameras had: exposure compensation, ISO, light metering mode (matrix/center/spot), focus mode and white balance.
● Change sensor parameters (like ISO, exposure compensation or white balance) also during recording.
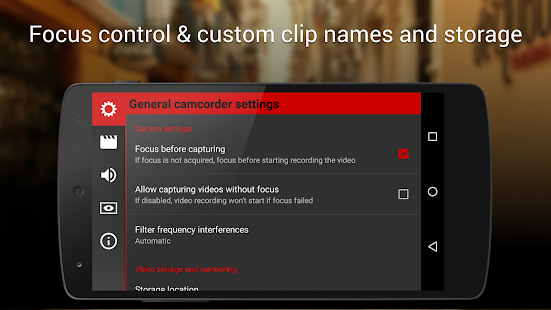
● Focus adjustments during recording: lock focus on your subject before recording and change focus planes while recording.
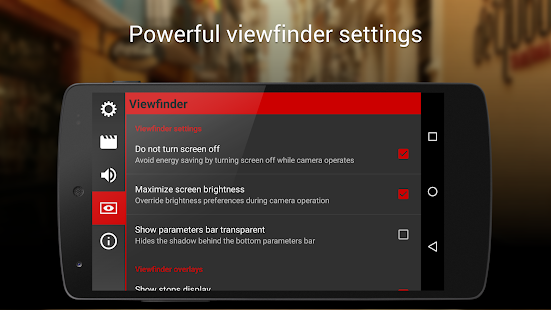
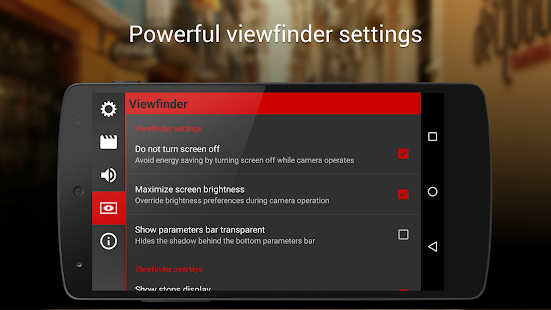
● Professional viewfinder: 10+ compositing grids, 10+ crop guides available, safe areas display and much more.
● The most advanced electronic viewfinder on a video camera: live RGB and luminance histogram are available also during recording.
● Professional sound metering options: display audio peaks and sound clipping warnings during recording.
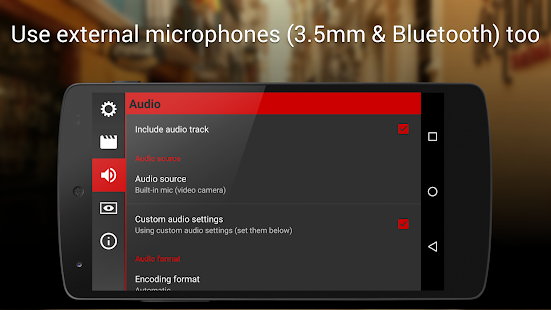
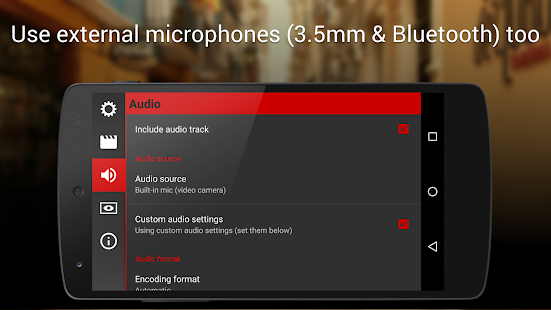
● Use any audio input source for your video: built-in microphone, external (wired) microphone or wireless (Bluetooth) headset.
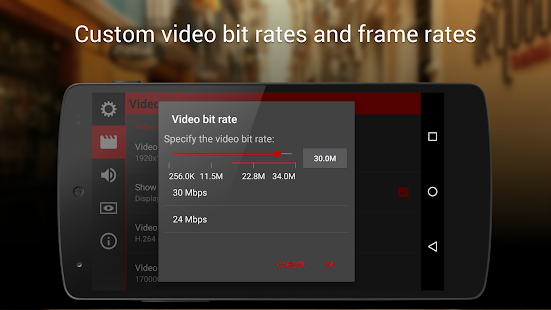
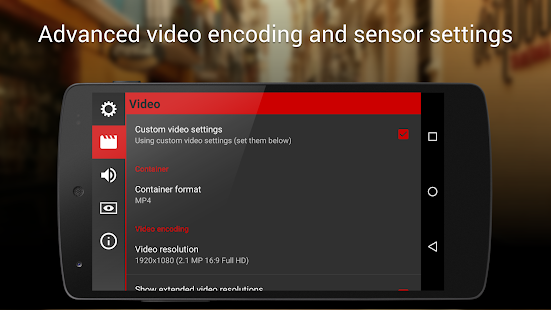
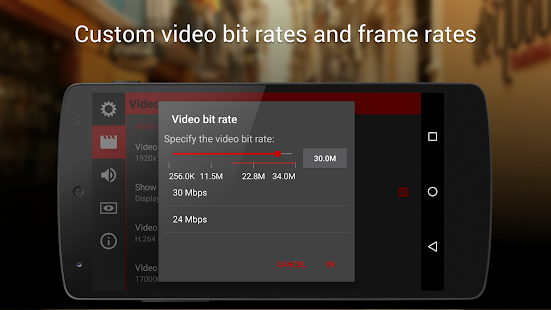
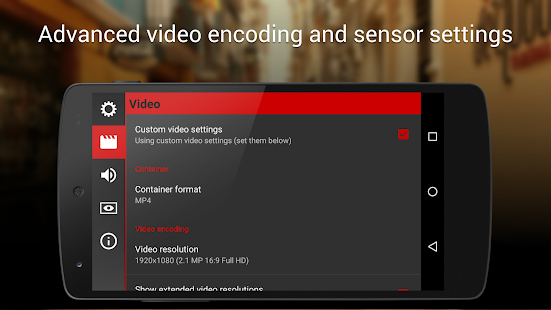
● Choose video and audio codec, adjust the bitrates, audio sampling rates and number of channels.
● Record in 4K UHD (Ultra High Definition) video on supported devices (currently only the Samsung Galaxy S5, Note 3, Note 4, Note Edge and Alpha).
● All camera functions assignable to volume keys. You can adjust EV, ISO, color temperature, zoom and more using volume keys (including those in cable-headsets) as well as focusing and recording. Devices with hardware camera shutter keys are also supported.
● Video geotagging support.
● Autofocus, macro, touch focus and infinity focus modes, plus a focus lock switch (AF-L).
● Autoexposure (AE-L) and auto white balance (AWB-L) locks in Android 4.0+. You can also lock exposure and white balance during clip recording automatically.
● Zoom after and while recording. Set specific focal lengths thanks to the 35mm equivalent-based focal length display.
● Powerful video clips organization options: different storage locations and fully customizable file names (even with variables).

Cinema FV-5 is the perfect app for producing the best footage for any short- to medium-sized production. With it you can record the best material possible with any medium- to high-end device. Cinema FV-5 specially supports Android-based compact cameras, so you can even leverage a high-quality, optically stabilized zoom. The footage captured with Cinema FV-5 can be easily edited on any NLE like Apple Final Cut Pro, Adobe Premiere, Sony Vegas or DaVinci Resolve.

For more information, visit the official website http://www.cinemafv5.com or download the official Cinema FV-5 User Guide at http://www.cinemafv5.com/tutorials/user_manual.php. For technical support, please read the FAQ (http://www.cinemafv5.com/faq.php) or write to support@cinemafv5.com.

Permissions explained:
- Approximate location and precise location: only used for geotagging functionality (disabled by default, and requires manual GPS activation).
- Modify or delete the contents of your USB storage and take pictures and videos: required for the usual camera operation.

⭐What's New
- New: possibility to save videos directly to the external SD card while using Android 5.0 Lollipop or newer. In Android 4.4 is still not possible to do this, as the OS blocked all apps from saving to the SD card.
- Fixed: added 4K recording support for missing Samsung Galaxy S5 variants.
- Fixed: image parameters not being saved on certain Lollipop devices.
- Fixed: on certain Lollipop devices, setting the ISO caused the image to go black (lowest frame exposure time).
- Fixed: LG G4 support.

⭐Requires Android
4.0 and up


Link Download